Tone mapping HDR images
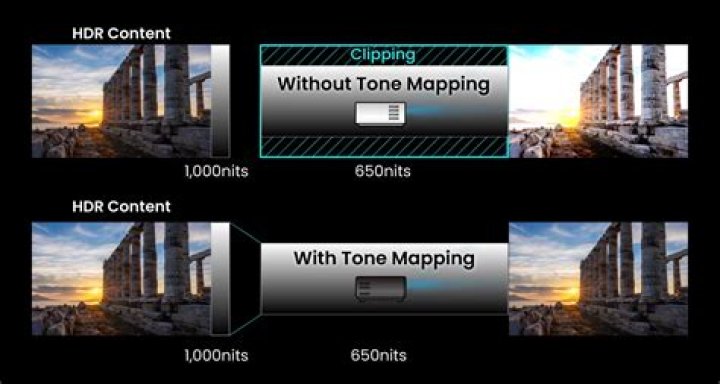
Tone Mapping is the process of taking a range of tones and remapping them to a smaller range that most displays and other devices can accurately reproduce.
To tone map an HDR image:
- With a 32-bit document open, select a pixel layer and then click Tone Mapping Persona.
- Once in the Tone Mapping Persona, your image will have a default tone map applied to it.
- Experiment with the adjustments in the Tone Map panel. See below for a list of options.
- On the context toolbar, click Apply.
Settings
The following settings are available in the Tone Map panel:
- Tone Compression—controls how much of the unbounded tonal range to map. Increasing the slider results in more tone compression.
- Local Contrast—adds or removes local contrast. Increasing local contrast helps to boost clarity in the image.
- Exposure—raises or lowers the overall exposure.
- Black Point—sets the black clipping level. Increase to further clip black tones.
- Brightness—controls mid tone levels. Increase to raise mid tones.
- Contrast—controls global contrast. Use in conjunction with Clarity to significantly change the tone mapped look.
- Saturation—adds or decreases overall color intensity.
- Vibrance—adds or decreases color intensity without clipping color tones.
- White Balance—changes the balance of color tones. Tones can be made cooler or warmer by dragging the Temperature slider, and color casts can be corrected using the Tint slider.
- Shadows & Highlights—controls compression of shadow and highlight tones. Useful for fine tuning tones.
- Detail Refinement—controls additional sharpening to the image. Its effects are more subtle compared to the Detail Refinement found in the Develop Persona. For a "gritty", over sharpened effect, try a large Radius value and small Amount value.
- Curves—allows adjustment of tonal range using a curves graph.